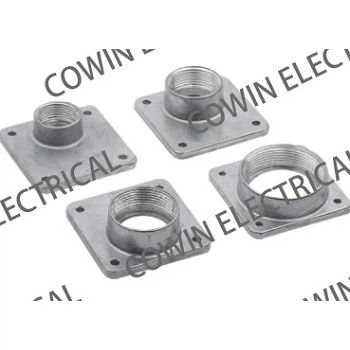
Installing a 125A meter socket can seem like a daunting task, but with the right knowledge and preparation, it can be a manageable project. As a leading supplier of 125A Meter Sockets, we're here to guide you through the entire process. This blog will provide you with a step-by-step guide on how to install a 125A meter socket safely and effectively.
Understanding the 125A Meter Socket
Before you start the installation process, it's crucial to understand what a 125A meter socket is and its components. A 125A meter socket is a crucial electrical device that connects your home or business to the utility power grid. It measures the amount of electricity you consume, allowing the utility company to bill you accurately. It consists of several key parts:
- The Socket Body: This is the main housing that holds the electrical contacts and wiring.
- The Meter Holder: This is where the utility meter is inserted.
- Electrical Contacts: These are used to connect the incoming power lines and the outgoing load wires.
You can find a wide range of Meter Socket and Meter Base options on our website, designed to meet different installation requirements.
Safety First
Electrical work can be dangerous, so it's essential to prioritize safety. Before you begin the installation, make sure you have the following safety equipment:
- Insulated Gloves: To protect your hands from electrical shocks.
- Safety Glasses: To prevent debris from getting into your eyes.
- Voltage Tester: To verify that the power is off before you start working.
It's also advisable to check your local electrical codes and regulations, as they may have specific requirements for meter socket installations. If you're not confident in your electrical skills, it's best to hire a licensed electrician to perform the installation.
Tools and Materials Needed
Here's a list of the tools and materials you'll need for the installation:
-
Tools
- Screwdriver set (both flathead and Phillips)
- Wire strippers
- Pliers
- Hammer
- Drill with appropriate bits
- Voltage tester
- Ladder (if the installation location is high)
-
Materials
- 125A meter socket
- Electrical conduit
- Electrical wire (sized according to local codes)
- Conduit fittings
- Mounting hardware (screws, bolts, etc.)
- Sealants (to protect against moisture)
Step-by-Step Installation Guide
Step 1: Turn Off the Power
The first and most important step is to turn off the power at the main electrical panel. Locate the main breaker and switch it to the "off" position. Use a voltage tester to double-check that there is no power flowing to the area where you'll be working.


Step 2: Choose the Installation Location
Select a suitable location for the meter socket. It should be easily accessible for the utility company to read the meter and be installed in a dry, protected area. The location should also be close to the main electrical panel and the incoming power lines. Make sure there is enough space around the meter socket for proper ventilation.
Step 3: Mount the Meter Socket
Use a drill to make holes in the mounting surface according to the holes in the back of the meter socket. Insert the appropriate screws or bolts and secure the meter socket firmly to the wall. Make sure the meter socket is level and plumb.
Step 4: Install the Electrical Conduit
Run the electrical conduit from the meter socket to the main electrical panel and the incoming power lines. Use conduit fittings to connect the sections of conduit together. Secure the conduit to the wall using conduit straps.
Step 5: Connect the Wires
Carefully strip the insulation from the ends of the electrical wires. Connect the incoming power lines to the appropriate terminals on the meter socket. Typically, these are labeled as "line" terminals. Then, connect the outgoing load wires to the "load" terminals. Make sure the connections are tight and secure using a pair of pliers.
Step 6: Install the Meter Holder
Insert the meter holder into the meter socket. Make sure it is properly aligned and secured.
Step 7: Seal the Connections
Use sealants to seal all the connections and openings in the meter socket and conduit. This will help prevent moisture and debris from entering and causing damage.
Step 8: Turn On the Power
Once you've completed all the connections and double-checked everything, turn on the power at the main electrical panel. Use a voltage tester to verify that there is power flowing to the meter socket.
Additional Considerations
- Environmental Protection: If the installation is outdoors, consider using an IP65 IP55 Distribution Enclosure Box Electric Cabinet to protect the meter socket from the elements.
- Three-Phase Systems: For commercial or industrial applications, you may need a 3 Phase Meter Box. Make sure to follow the specific installation instructions for three-phase systems.
Contact Us for Your 125A Meter Socket Needs
If you're in the market for a high-quality 125A meter socket or have any questions about the installation process, we're here to help. As a trusted supplier of electrical equipment, we offer a wide range of products to meet your needs. Whether you're a homeowner, contractor, or business owner, we can provide you with the right solutions.
Don't hesitate to reach out to us for more information or to discuss your specific requirements. We look forward to working with you and helping you with your electrical installation projects.
References
- National Electrical Code (NEC)
- Manufacturer's installation instructions for the 125A meter socket